• Home
  • MAKE
    • Free Sewing Patterns
    • Tutorials
    • Japanese Sewing Patterns
    • Sewing Pattern Review
    • Sew Alongs
    • Accessories
    • Crafts
    • Kids & Baby
    • Knitting
  • My House
  • LIFE
    • Rin’s Life
    • Recipes
    • Healthy Habits
    • Simple Joys
    • Blogging
  • Free Facebook Group
  • About
    • About Rin
    • Disclosure + Privacy Policy

Sew in Love

  • Home
  • MAKE
    • Free Sewing Patterns
    • Tutorials
    • Japanese Sewing Patterns
    • Sewing Pattern Review
    • Sew Alongs
    • Accessories
    • Crafts
    • Kids & Baby
    • Knitting
  • My House
  • LIFE
    • Rin’s Life
    • Recipes
    • Healthy Habits
    • Simple Joys
    • Blogging
  • Free Facebook Group
  • About
    • About Rin
    • Disclosure + Privacy Policy
  • {FREE} Sewing Patterns

  • {FREE} Boxy Dress Workshop

  • {FREE} Japanese Sewing Guide

DIY FashionSewing Pattern Review

Failed! Burdastyle Michelle skirt in grey wool

This is my first Burda pattern sewing project.  I was after a flattering skirt pattern, suitable to wear at the office, and found this A-line pleated skirt on BurdaStyle.  Apparently it is an “easy” pattern, but as usual, I made things far more complicated for myself by making it out of thick wool.  Believe it or not, this is leftover fabric from our dining chairs which I re-upholstered last year.  I covered the seats of our retro dining chairs using this grey wool.  It looks pretty strange when I sit at my dining table wearing this skirt!

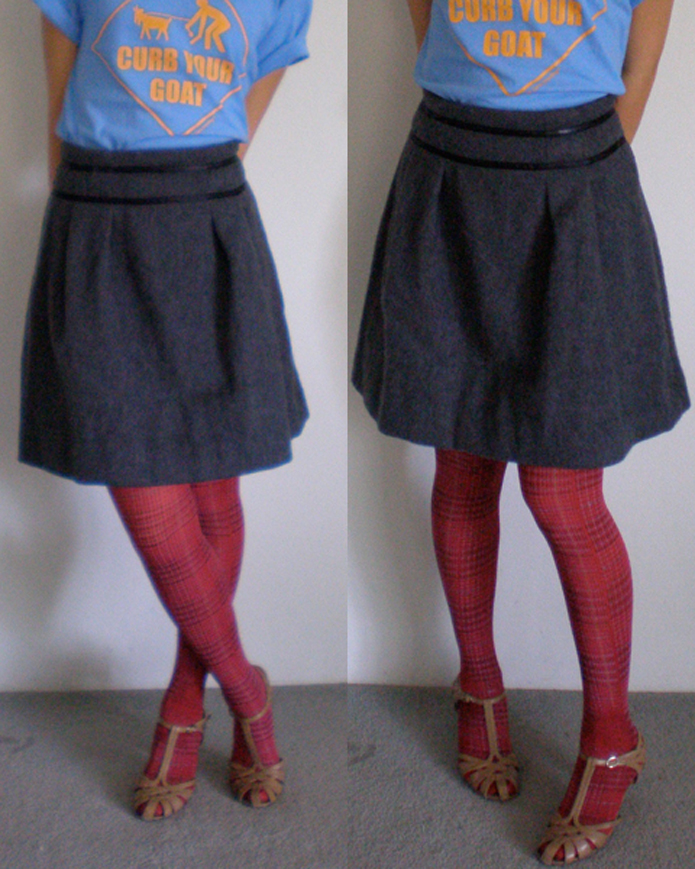
Perhaps the fabric is the reason why I failed.  I thought did a really good job making this skirt, however, it is way too big.  It’s such a shame, because I went through the heartache to pressing pleats and basting them in place, taking weeks, because if the thickness of the fabric…but I can’t wear this skirt.  I this photo, Dave used a clamp from his toolbox to keep the skirt from sliding down my waist.  Thats the black thing sticking out in the second photo.  Hilarious.

My mum thinks I may have stretched the fabric out, because I had to iron it to death.  I used the smallest size available.  I don’t know what happened, but I am not that small, there are people a lot skinnier than me who have made this skirt successfully.  All I know is that I am keen to try again!

Failed! Burdastyle Michelle skirt in grey wool was last modified: September 21st, 2010 by Rin
DIY Bow Headband | Learn how to make this cute and easy headband. You only need a some scrap bits of fabric and 20 minutes!
AccessoriesDIY Fashion

Giant Purple Bow Fabric Headband

I have definitely been obsessed with making hair accessories lately. Quick, fun and easy to make; I think I’m addicted to the cheap sense of achievement. I managed to complete a bow headband and a scrunchie in one day. That’s pretty good for me, on top of the housework, weekend sport (hockey) and grocery shopping required on Saturdays.

Actually, I was up at 6am to make this bow headband, because I desperately needed something zany and purple to wear for my last hockey game. Our team colour is purple, so for our final game of the season, we decided to wear crazy headgear. I’m proud to say whilst my team mates’ hair accessories kept falling off during the game, my bow stayed perfectly in tact. It was hilarious watching purple wigs and purple pom poms falling off heads as we raced around the field! The other team didn’t find it as amusing though…  My beautiful friend Beth, strikes again as my hair model.  Doesn’t she look cute?

If you need something to distract you from an ongoing, big craft project, give making hair accessories a go. It’s a pretty good distraction from anything too difficult and time consuming. There’s a free download of How to make a scrunchie illustrated instructions available, and I have also posted a full scrunchie tutorial with photos.

Giant Purple Bow Fabric Headband was last modified: September 18th, 2010 by Rin
AccessoriesDIY Fashion

Easy Step by Step Hair Scrunchie Tutorial & Pattern with Photos

If you can sew a straight line, you can make a scrunchie.  They make really cute gifts for little girls too!  I am addicted to making these because it lets you whip out those fabric remnants you’ve kept in the cupboard for so long.

This is a gingham check version with a red daisy.  Check out my leopard print version here, and you can download the free hair scrunchie tutorial here .

1. Stitch with right sides facing, 1cm hem.

This fabric is 45cm x 10cm long.  It makes a good kids size scrunchie, or a small/medium scrunchie for adults.

2. Rotate and press.

Optional Step

You can stitch a decorative item on the right side of your scrunchie here.  You could also stitch it on at the end, especially if it is a large motif.

3.  Fold & Pin

Ensure right sides are facing.  Fold in the top layer.  Pin the bottom layer edges together, ensuring the top layer is safely bundled inside.

4. Stitch & pull out the inside of the scrunchie.

Stitch 0.5cm along the edge, making sure that you are only stitching two pieces of fabric together.  As you move along the scrunchie, pull out the inside.

5. Turn right side out and insert elastic.

You should end up with the above.  Turn right side out.

Insert elastic and tie a knot.  Hand stitch the opening closed.

Easy Step by Step Hair Scrunchie Tutorial & Pattern with Photos was last modified: September 18th, 2010 by Rin
DIY Scrunchie | Learn how to make a hair scrunchie, just like we all used to wear in the 90's! The modern way to wear it is over a top knot, like this :-D
AccessoriesDIY Fashion

Free Hair Scrunchie Pattern & Tutorial

Hehe, this cheeky scrunchie was made from the fabric that was cut off from a pair of pants in this blog.  I just undid the old hem, and here’s a very cute little hair accessory!  What a great way to use up fabric remnants. You could probably do this with soft denim, if you’re like me and need to shorten the hem all the time…

Before I inserted the elastic, I stitched on three bows, made from satin ribbon.  Now I just need my hair to grow faster so I can tie a ponytail (it’s a bob atm).  Special thanks to the beautiful (and newly blonde) Beth, for being my model xx

There’s a step by step how to make scrunchie tutorial with photos, or you can download the How to make a scrunchie download – enjoy 🙂

Free Hair Scrunchie Pattern & Tutorial was last modified: August 29th, 2010 by Rin
DIY FashionJapanese Sewing Patterns

Dress made from 80′s Japanese Sewing Pattern

I have an awesome sewing book from Japan which my Mum must have bought in the 80s.  It has patterns for all sorts of cute clothes for girls aged between 12 to 16.  The patterns are simple and instructions are illustrated, so even I can make them without throwing a tantrum.  There’s lots of dresses and skirts, as well as a few patterns for vintage shorts and sportswear!  Each item of clothing is beautifully illustrated, modelled by retro looking girls with a whimsical quote for each illustration.  They don’t make pattern books like this anymore!

I loved the classic cut of this dress (a bit toddler-esque?) and managed to finish it off in two days.  I actually ran out of green thread, otherwise, I think I could have made it in one day!  The dress is not lined, that’s probably why it was so quick to make…

Being a very plain dress, I’m looking forward to dressing it up with jewellery, scarves or a vest.  It’s winter here in Sydney, so I have been wearing my toddler dress with a cardi thrown on top 🙂

Dress made from 80′s Japanese Sewing Pattern was last modified: August 8th, 2010 by Rin
Newer Posts
Older Posts

Hello, I’m Rin

Hello, I’m Rin

I help busy women live a more beautiful and meaningful life. I’m passionate about sewing, crafts, and sustainable living. Let’s start creating! More about me.

COME SEW WITH ME


Free Little Boxy Dress Sewing Workshop

Most Popular

  • Free Sewing Pattern: Reversible V-neck and Crewneck Shift Dress

    January 25, 2015
  • Make your own Free People inspired summer dress!

    Free Sewing Pattern & Tutorial: Free People inspired summer dress

    September 18, 2015
  • Tunic Dress: Is this the best Japanese sewing pattern maker?

    May 7, 2016

Follow @sewinlove on Instagram

  • Introducing one of our fave cities to the girls. Trams and the Japanese food have been a big hit!
  • The last stop on our Far North QLD adventure was Fitzroy Island. We did kayaking, snorkelling and went on a
  • We’ve sadly said goodbye to the incredible Daintree National Park and are heading back towards Cairns. The trip isn’t complete
  • Taking a pause and staying awhile at #capetribcamping , an awesome spot where the rainforest meets the sea. We’ve been
  • Far North Queensland really living up to its reputation now, with super sunny days and lots of wildlife! We saw
  • We picked up our campervan in Cairns and it’s been our cozy home for the last few nights. We’ve visited
  • Week 1 of our Queensland holiday: Long overdue catch up with our Brisbane fam. We made it, despite flight cancellations
  • We had friends coming, so she dusted and vacuumed. Not sure what phase of growing up this is, but I’m
  • Facebook
  • Instagram
  • Pinterest
  • Youtube
  • RSS

©2020 - Sew in Love. All Right Reserved. Sew in Love is a participant in the Amazon Services LLC Associates Program, an affiliate advertising program designed to provide a means for sites to earn advertising fees by advertising and linking to Amazon.com