• Home
  • MAKE
    • Free Sewing Patterns
    • Tutorials
    • Japanese Sewing Patterns
    • Sewing Pattern Review
    • Sew Alongs
    • Accessories
    • Crafts
    • Kids & Baby
    • Knitting
  • My House
  • LIFE
    • Rin’s Life
    • Recipes
    • Healthy Habits
    • Simple Joys
    • Blogging
  • Free Facebook Group
  • About
    • About Rin
    • Disclosure + Privacy Policy

Sew in Love

  • Home
  • MAKE
    • Free Sewing Patterns
    • Tutorials
    • Japanese Sewing Patterns
    • Sewing Pattern Review
    • Sew Alongs
    • Accessories
    • Crafts
    • Kids & Baby
    • Knitting
  • My House
  • LIFE
    • Rin’s Life
    • Recipes
    • Healthy Habits
    • Simple Joys
    • Blogging
  • Free Facebook Group
  • About
    • About Rin
    • Disclosure + Privacy Policy
  • {FREE} Sewing Patterns

  • {FREE} Boxy Dress Workshop

  • {FREE} Japanese Sewing Guide

DIY FashionJapanese Sewing Patterns

Japanese Sewing Pattern: Harem Pants from Happy Homemade Sew Chic

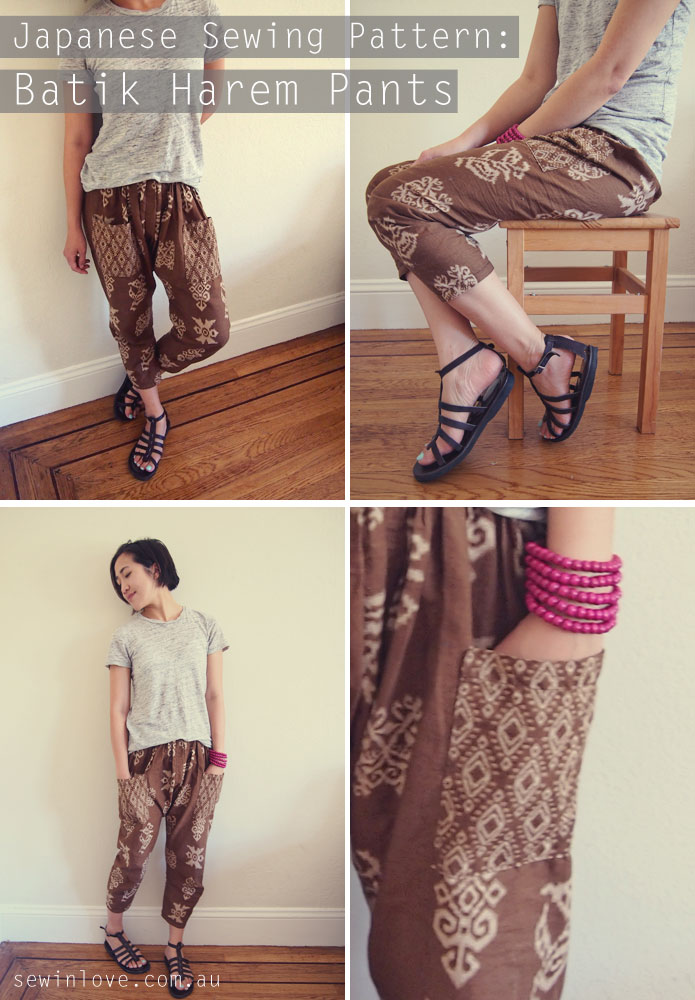
When harem pants came into fashion a few years ago, I thought of them as a fad; until I tried a pair on myself! They are really comfortable, and flattering, thanks to the ruching around the crutch which then tapers into a narrow leg opening.
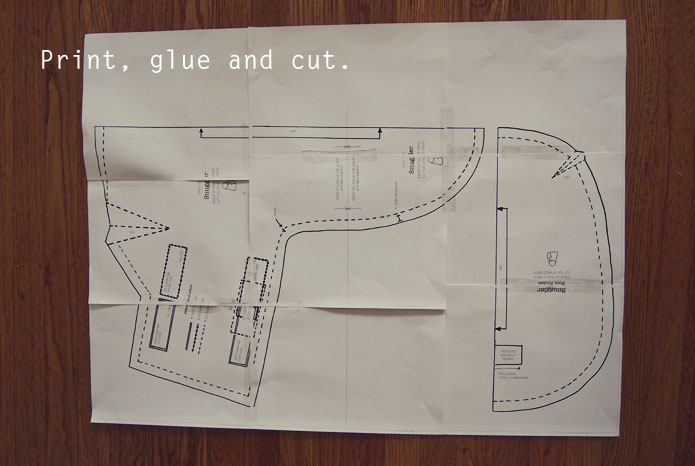
 

The Pattern

This sewing pattern is from the Japanese sewing book, Happy Homemade Sew Chic. The book calls it ‘Design L: Straight-cut Sarouel Pants’. I’m not sure what sarouel pants are, but these to me are harem pants, and they are indeed straight-cut. The sewing pattern is simply 3 pieces of fabric, plus 2 rectangles for the pockets.

You can make these pants in a few hours. To save time, I only traced the patten for the leg piece. For the center panel and pockets, I simply measured the sewing pattern and drew rectangles on the fabric directly. Yay for straight-cut!

Happy Homemade Sew Chic is available from Amazon in English. Here’s the YouTube video review for this book!

These harem pants are the pants the model is wearing on the cover of the book:
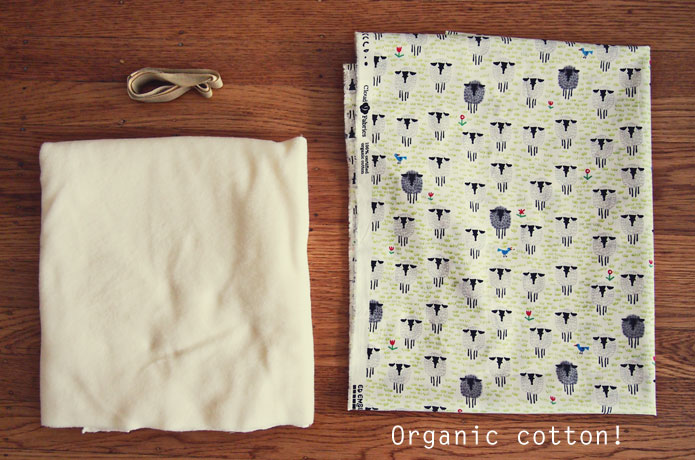
The Fabric

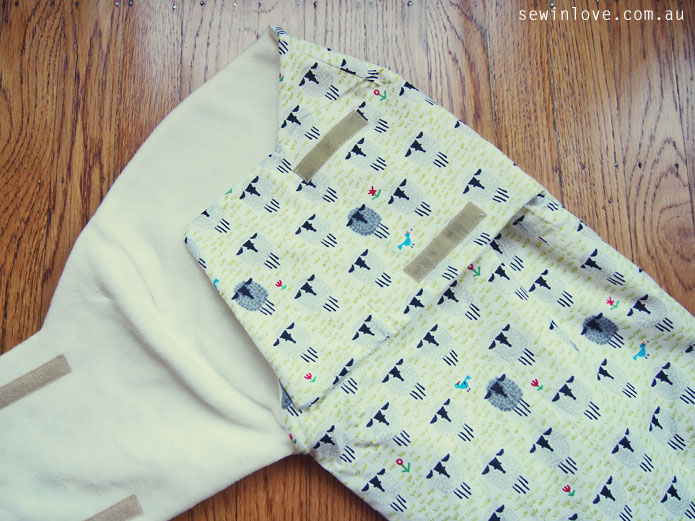
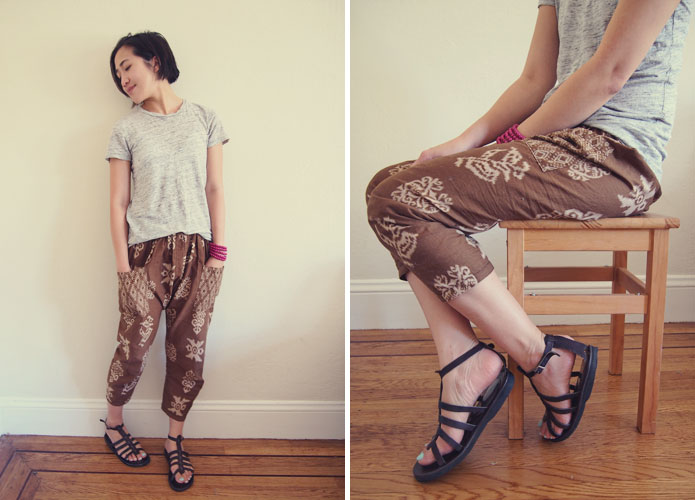
The book recommends fabrics like hemp and jersey for this sewing pattern. I purchased my brown batik fabric in Indonesia last year. I used some to make my husband an up-side down pocket t-shirt,but had just the right amount left to make these pants. I think any mid to heavy weight fabric would work well. I’d stay away from linen though, because that stuff just wrinkles all the time and it wouldn’t work so well with the ruching.

The batik had two different patterns going on, so I used the more intricate, diamond part for the pockets.

Japanese-sewing-pattern-batik-harem-pants-happy-homemade-sew-chic---Pinterest

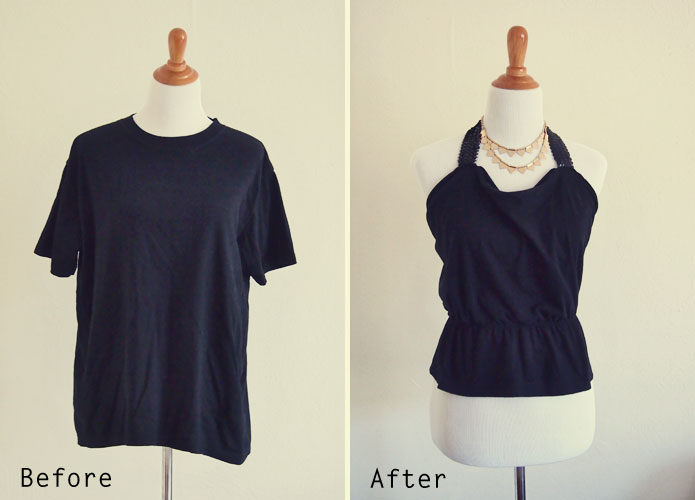
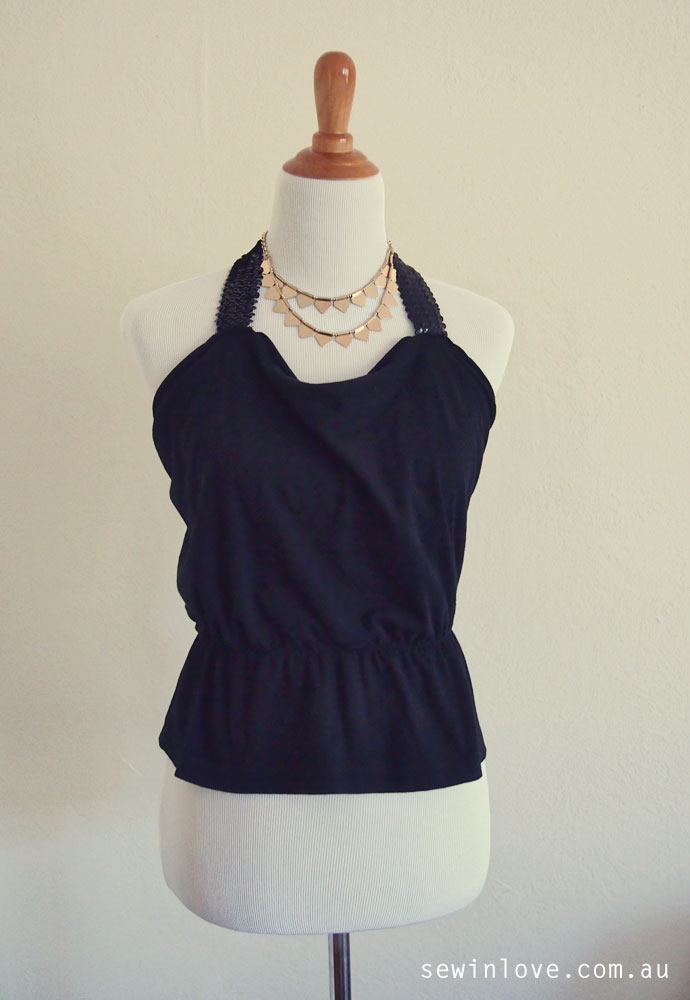
I practically live in skinny jeans, so elastic waisted loose pants like these are such a nice change! I wear them lounging around the house a lot, and I also wore them in Mexico with my T-shirt refashioned sequin halter top. Teamed with gold sandals and big earrings, it made a cool (as in temperature cool) outfit for dining out in Tulum.


Japanese Sewing Pattern: Harem Pants from Happy Homemade Sew Chic was last modified: October 5th, 2014 by Rin
Kids & Baby

Free Sewing Pattern: Studio Ghibli Kiki’s Delivery Service Jiji Cat Purse Bag

Growing up in Japan, Studio Ghibli’s movie, Kiki’s Delivery Service was my absolute favourite. I even had a haircut just like Kiki, and of course, I wished that I had a talking cat like Jiji! As part of Sew Geeky’s Ghibli Episode, I’ve decided to make a cute little cat purse inspired by Jiji. I managed to put this project together using only the fabric in my stash – don’t you love it when that happens? The beauty of small projects like purses is that you really don’t need much fabric at all. The best part of this project though, was the trip down memory lane to when I ran around the house with a broom, pretending to fly like Kiki!

You will need

  • Black fleece
  • White or cream fleece (for eyes)
  • Pale purple cotton fabric (for ears)
  • Other cotton fabric (for lining)
  • Dark fusible interfacing – medium weight
  • Iron-on applique contact sheet
  • Black zipper (15cm or 6″)

Instructions

Step 1

Download the sewing pattern from my Free Creative Resources Library. Sign up below to get access:

Print it on US Letter or A4 paper, ensuring you don’t choose “Fit to Size” on your printer. Check that the test square is the correct size.

Step 2

Trace the ear and eye with tracing paper to make paper patterns. Cut two eyes and two ears, which are mirror images of each other. These do not need a seam allowance. Ghibli-jiji-cat-purse-sewing-pattern-1

Step 3

Cut the fabric to make Jiji’s head. You need to add seam allowance (see diagram below) to the following pieces:

  • Front Head (cut 1 each from black fleece and interfacing)
  • Front Head without ears (cut 1 from lining fabric)
  • Upper Back Head (cut 1 each from black fleece and interfacing)
  • Upper Back Head without ears (cut 1 from lining fabric)
  • Lower Back Head (cut 1 each from black fleece, lining fabric and interfacing)

Ghibli-jiji-cat-purse-seam-allowances You can use the same black fleece as Jiji’s head to cut the little irises of his eyes. Ghibli-jiji-cat-purse-sewing-pattern-head Remember, you can omit the ears for the lining. Ghibli-jiji-cat-purse-sewing-pattern-lining

Step 4

Attach the eyes and ears to the head with an iron-on applique contact sheet. Using the zig-zag stitch on your sewing machine, go over the outline of each piece. Ghibli-jiji-cat-purse-sewing-pattern-eyes Hand stitch the nose with pink embroidery thread. Ghibli-jiji-cat-purse-sewing-pattern-face-applique

Step 5

Attach the zipper to the back of Jiji’s head. Ghibli-jiji-cat-purse-sewing-pattern-zipper

Step 6

Ensuring you keep the zipper OPEN, stitch the front and back pieces of the head together, right sides facing. Snip around the edges of the ears. Ghibli-jiji-cat-purse-sewing-pattern-snip-ears

Step 7

Make the purse lining. Press the seam allowance for the zipper opening, and stitch each end to meet either side of the zipper. Ghibli-jiji-cat-purse-sewing-pattern-lining-opening Right sides facing, stitch the front and back pieces of the lining together.

Step 8

Attach the lining to the outer fabric by sewing within the seam allowances of the two pieces. Ghibli-jiji-cat-purse-sewing-pattern-attach-lining

Step 9

Turn bag over to right side. Hand stitch the lining on to the zipper opening. Ghibli-jiji-cat-purse-sewing-pattern-last-step

Finished!

You could add a little handle, or shoulder straps to make this purse into a handbag for a little girl. I’m using my Jiji purse for travel, as a nice soft bag to store my jewellery. Ghibli-jiji-cat-purse-sewing-pattern-Pinterest I hope this project brings out your inner Kiki too! xx Ghibli-jiji-cat-purse-sewing-pattern-Rin

Click each picture below to check out the stars of this episode of Sew Geeky!

Big Ghibli fan? Make this Jiji cat purse, straight out of Kiki's Delivery Service.

Totoro by Rae Gun Ramblings Nausicaa by Sew Chibi Princess Mononoke by Sew Chibi Calcifer, Howl's Moving Castle by Sew Chibi Howl's Moving Castle by Robutton Jiji, Kiki's Delivery Service by You and Mie Totoro & Princess Mononoke by Amelie & Atticus Jiji, Kiki's Delivery Service by Sew in Love Chihiro/Sen, Spirited Away by Max California Totoro by Casa Crafty Kiki's Delivery Service by American Kat Totoro by The Life of a Compulsive Crafter Sew Geeky Episode 6: Studio Ghibli Image Map
Free Sewing Pattern: Studio Ghibli Kiki’s Delivery Service Jiji Cat Purse Bag was last modified: September 23rd, 2014 by Rin
Kids & Baby

Free Sewing Pattern Review: Snuggler baby swaddle wrap

My very good friend, and fellow Aussie expert, Liz had a baby girl recently. She is the most gorgeous little thing! I was super excited to get some baby sewing happening, but wanted to ensure it was cute AND useful.

After scouring the web, I settled on making a baby swaddle wrap, using this free sewing pattern by Lotta Jansdotter. The sewing pattern is a free extract from her book, Simple Sewing for Baby: 24 Easy Projects for Newborns to Toddlers (published by Chronicle Books).


Materials

For the exterior, I used an organic cotton called Happy Drawing Too Organic Sheep in white, from Fabric.com. At the time that I chose the fabric, I didn’t know if we were expecting a boy or girl. I think the little sheep were a safe choice! The interior lining is a creamy fleece fabric. You’ll also need velcro which matches your exterior fabric.


free-sewing-pattern-baby-swaddle-wrap-materials


The Sewing Pattern

Download the free sewing pattern for the baby swaddle wrap by Lotta Jansdotter here.

Once I printed the free sewing pattern, I cut off the top and left borders of each sheet. I stuck the nine sheets of paper together using sticky tape. Make sure you double check the alignment of the pattern markings, or you’ll end up with an extra large swaddle wrap!

free-sewing-pattern-baby-swaddle-wrap-print


I found the instructions quite straightforward, but the foot pocket didn’t attach to the main piece as neatly as I would have liked. I think I just need to be more patient and stitch slower around curves…

I found the placement of the velcro to be a little confusing as well, but I got there in the end. I ended up swapping the right and left sides, but it’s symmetrical, so it doesn’t matter. I highly recommend using iron-on hem tape to keep the velcro strips in place while you sew. The correct placement of velcro strips is crucial!

Overall, the pattern is nicely designed, and I really recommend it if you have a bit of sewing experience.


The Finished Swaddle Wrap

The final swaddle wrap turned out very well, I think. By the time I finished making it, the baby was 3 months old (!) but she seems to be able to fit into it, thank goodness!

free-sewing-pattern-baby-swaddle-wrap-2


free-sewing-pattern-baby-swaddle-wrap-3


I made a matching drawstring bag with remaining fabric, for Liz to keep little baby things organized in her nappy bag. The matching set made a such a cute little present! Do you have any sewing ideas for cute, useful baby gifts?

The most handy thing ever, for newborn babies! Make one yourself with this free sewing pattern.


Free Sewing Pattern Review: Snuggler baby swaddle wrap was last modified: September 14th, 2014 by Rin
DIY FashionTutorial

How to video: DIY Old T-shirt to Cute Halter Top Tutorial

I went away to Tulum, Mexico over summer, and this halter top was perfect for the hot weather! I live in San Francisco, where it just does not get warm enough to wear a halter top, so I decided to make one on the cheap from and old t-shirt.

This halter top has a sequin elastic neckband, making it easy to pull on and off. At first, I was scared about using sequins in case it made the top look too young, but I think the cowl neck and peplum waistline tone it down a lot.


You will need

  • Large mens t-shirt, the bigger the better!
  • Sequin elastic (2.5cm or 1″ wide)
  • Elastic tape for the waistline (1cm or 1/3″ wide)

Although my halter top is black, I just used white elastic tape I had on hand. You can’t see it anyway, so please feel free to use up any leftovers in your stash.


How to make

The tutorial is over on YouTube:

This halter top looks cute with any denim bottoms – I wore mine with black denim shorts to stay cool in Mexico. It also looks nice with black trousers for dinner, or tucked into a high waisted skirt.

DIY-Tshirt-to-Cute-Halter-Top-Refashion-1


To wash this top, you can throw it into a delicates bag in the washing machine.

DIY-Tshirt-to-Cute-Halter-Top-Refashion-Pinterest

How to video: DIY Old T-shirt to Cute Halter Top Tutorial was last modified: September 6th, 2014 by Rin
AccessoriesDIY Fashion

How to video: DIY Shibori tie-dye circular scarf

Shibori means to wring or squeeze in Japanese. This tie-dye method creates beautiful organic patterns on your fabric. Here’s a simple video tutorial on how to make your own shibori tie-dye scarf.

Shibori-Tie-Dye-Circular-Scarf-Pinterest

Part 1 is all about the tie-dye method. It’s very easy and if I was able to do it in my tiny studio apartment, you can do it anywhere!

In Part 2, we sew the shibori fabric into a circular scarf. It comes quickly together using your sewing machine, but there’s a bit of hand sewing involved at the end.

I’m by no means on top of fashion trends, but I have noticed there is a lot of (expensive) shibori scarves in the stores right now! Like this beaded one from Anthro and a simple version from Madewell. The longer length of my version of the shibori scarf makes it really versatile. Here’s some more ways to wrap it.

Shibori-Tie-Dye-Circular-Scarf-How-to-tie-1

Shibori-Tie-Dye-Circular-Scarf-How-to-tie-2


Make your own Anthropologie inspired shibori tie-dye circular scarf.


How to video: DIY Shibori tie-dye circular scarf was last modified: June 21st, 2014 by Rin
Newer Posts
Older Posts

Hello, I’m Rin

Hello, I’m Rin

I help busy women live a more beautiful and meaningful life. I’m passionate about sewing, crafts, and sustainable living. Let’s start creating! More about me.

COME SEW WITH ME


Free Little Boxy Dress Sewing Workshop

Most Popular

  • Free Sewing Pattern: Reversible V-neck and Crewneck Shift Dress

    January 25, 2015
  • Make your own Free People inspired summer dress!

    Free Sewing Pattern & Tutorial: Free People inspired summer dress

    September 18, 2015
  • Tunic Dress: Is this the best Japanese sewing pattern maker?

    May 7, 2016

Follow @sewinlove on Instagram

  • Introducing one of our fave cities to the girls. Trams and the Japanese food have been a big hit!
  • The last stop on our Far North QLD adventure was Fitzroy Island. We did kayaking, snorkelling and went on a
  • We’ve sadly said goodbye to the incredible Daintree National Park and are heading back towards Cairns. The trip isn’t complete
  • Taking a pause and staying awhile at #capetribcamping , an awesome spot where the rainforest meets the sea. We’ve been
  • Far North Queensland really living up to its reputation now, with super sunny days and lots of wildlife! We saw
  • We picked up our campervan in Cairns and it’s been our cozy home for the last few nights. We’ve visited
  • Week 1 of our Queensland holiday: Long overdue catch up with our Brisbane fam. We made it, despite flight cancellations
  • We had friends coming, so she dusted and vacuumed. Not sure what phase of growing up this is, but I’m
  • Facebook
  • Instagram
  • Pinterest
  • Youtube
  • RSS

©2020 - Sew in Love. All Right Reserved. Sew in Love is a participant in the Amazon Services LLC Associates Program, an affiliate advertising program designed to provide a means for sites to earn advertising fees by advertising and linking to Amazon.com